Martha Stewart’s sugar cookies are classic cut-and-decorate cookies made from seven pantry staples: flour, baking powder, salt, butter, sugar, eggs, and vanilla. The recipe yields 2 dozen 4-inch cookies with 45 minutes of active work plus about 2 hours of chilling.
The recipe is an exact match from marthastewart.com, where her team bills it as the ultimate sugar cookie for cutouts and pairs it with her royal icing. Everything below follows that original, including her own equipment guidance and decorating tips.
Give the cut cookies their 15-minute freezer chill before they bake, because solid butter melts slowly in the oven. Skip it and the butter liquefies on contact, so the shapes spread, the sharp edges blur, and the cookies bake up thin and overly crisp.
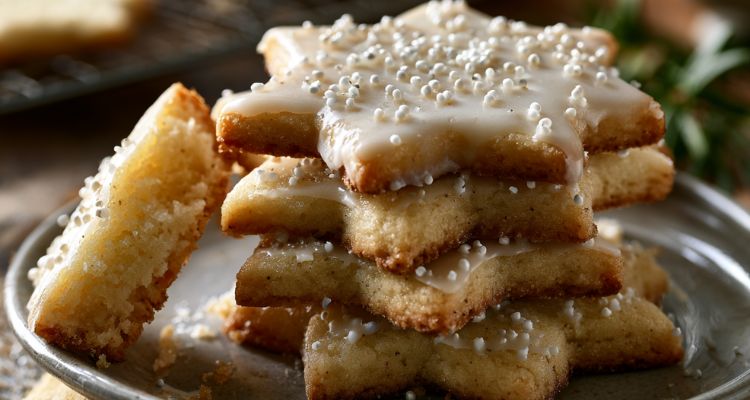
Martha Stewart Sugar Cookies
Course: DessertCuisine: AmericanDifficulty: Easy24
servings30
minutes15
minutes210
kcal2
hours45
minutesThis holiday cut-out cookie dough holds intricate shapes and bakes with golden edges and tender centers. Make a batch for gifting, or turn decorating into a weekend project with kids.
Ingredients
4 cups (500g) sifted all-purpose flour, plus more for the surface and more if needed
1 teaspoon baking powder
½ teaspoon salt
8 oz (225g / 2 sticks) unsalted butter, softened
2 cups (400g) sugar
2 large eggs
2 teaspoons pure vanilla extract
Royal icing
Directions
- Sift the dry ingredients. Sift the flour, baking powder, and salt into a bowl.
- Cream and combine. Beat the butter and sugar on medium speed until pale and fluffy, about 3 minutes. Beat in the eggs and vanilla, then mix in the flour mixture on low.
- First chill. Divide the dough in half, flatten each half into a disk, and wrap in plastic. Refrigerate until firm, at least 1 hour or overnight.
- Roll and chill again. Preheat oven to 325F (165C) with racks in the upper and lower thirds. Let one disk soften about 10 minutes, roll it to just under ¼ inch (6mm) on a floured surface, then refrigerate until firm, about 30 minutes.
- Cut the shapes. Cut out cookies and move them to parchment-lined sheets as you work. Reroll the scraps once, then repeat with the second disk.
- Final chill. Freeze the cut cookies until very firm, about 15 minutes.
- Bake. Bake, switching and rotating the sheets halfway through, until the edges turn golden, 15 to 18 minutes. Cool on the sheets on wire racks, then decorate.
Notes
- Notes (from Martha’s original):
Equipment: a sifter or fine-mesh sieve for the dry ingredients, and a stand or handheld mixer for creaming, which traps air for lighter, more tender cookies. Roll to about ¼ inch, since thinner bakes too crisp and delicate while thicker bakes unevenly. Line sheets with parchment or silicone mats. With 4-inch cutters you get about 2 dozen, and the dough doubles or triples easily.
Flooding: pipe a thin icing border around each cookie’s edge first so the icing cannot run off, then fill inside the line and close gaps with a toothpick.
Color and consistency: gel food coloring beats liquid drops, giving vibrant hues with less dye, and keeping some white icing back lets you lighten a shade. Aim for toothpaste-thick icing for detailed designs and honey-thick for outlines and flooding.
FAQs
Why does this dough chill three separate times?
Each chill has its own job, and her page spells them out. The first rest hydrates the flour, firms the butter, and relaxes the gluten so the dough rolls without fighting back.
The second chill firms the rolled sheet so cutouts release cleanly with sharp edges, even from intricate cutters. If your freezer cannot fit the sheets for the last chill, her fix is 30 minutes in the fridge. The same cold-butter logic drives her pie crust.
Can I make the dough the night before?
Yes, and her page recommends exactly that split. The first chill is built to run overnight, so mixing the dough after dinner and baking the next day is part of the design.
Wrapped disks also give you flexibility on baking day. Pull one from the fridge at a time, since the second disk stays perfectly firm while you roll, cut, and bake the first.
Why can the scraps only be rerolled once?
Every pass under the rolling pin works the gluten and presses in extra surface flour. By the third roll the dough turns tough, and those cookies bake up dense with edges that shrink.
Cut shapes close together on the first roll to keep scraps small. Second-roll cookies still bake fine, so save simple shapes for them and give the detailed cutters first-roll dough.
Do I have to decorate with royal icing?
No, the cookies stand on their own with a tender, vanilla-forward crumb. Royal icing is her pairing because it dries completely hard, so decorated cookies stack, ship, and gift without smudging.
Buttercream tastes richer but never sets, so it rules out stacking and boxing. For bare cookies, a sprinkle of coarse sugar before the bake adds shine and crunch with no drying time.
How long do these sugar cookies keep?
Up to one week in an airtight container at room temperature, straight from her page. That week makes them one of the better bakes for mailing and gift boxes.
Decorated cookies need one extra step. Let the royal icing set for at least 24 hours before sealing, because icing boxed too soon smears and glues the cookies together. That shelf life beats her banana bread, which stays moist only a few days.